Version: v2510

Setup

AIBooster can be used in two ways:

  1. Using AIBooster Server provided as SaaS
  2. Deploying AIBooster Server on your own server

Below, we refer to method 1 as the SaaS version and method 2 as the on-premises version, describing the minimum setup for each.

Supported Environment

For machines running Server and Agent, the following conditions must be met:

ServerAgent
CPUIntel/AMD (64bit) 8 coresIntel (64bit) (*1)
GPU-NVIDIA Datacenter GPU (*2)
Memory64GB32GB
Storage1TB-
OSUbuntu 24.04Ubuntu 24.04
  • *1: AMD CPUs are not supported unless there is a paid deployment contract.
  • *2: Operation has been confirmed on H200, H100, A100, and RTX 6000Ada. GPUs compatible with NVIDIA DCGM may work but are currently not supported.

SaaS Version

Users can start using the product by registering for the AIBooster service and installing the Agent.

User Registration

Please fill in the required information on the product page to apply for service registration. A registration link will be sent to the email address you provided. Please click on that link.

When you access the link, a screen like the image below will be displayed. Please log in using your Google account or Microsoft account. *Note: The wording may differ from the production version as this is a development environment.

saas-login

After that, a screen to confirm the terms of service and privacy policy will appear. After reviewing each document, you can proceed by agreeing to them.

saas-agreement

Email address verification is required to use the SaaS version. When you log in for the first time after verification, you will see a screen like the following.

saas-first-login

Joining an Organization

The SaaS version of AIBooster manages Grafana dashboards and data in units called "Organizations." An AIBooster Server instance is created for each Organization, and users belonging to the same Organization can access the same Grafana dashboards and data. When you first register as a user, you do not belong to any Organization. To join an Organization and access the Grafana dashboard, you need to either create a new Organization or be invited to an existing Organization.

Creating a New Organization

Access the portal page and click "Create one".

saas-first-organization-create

After that, you can create an Organization by entering the Organization name.

saas-organization-create

Creating a new Organization takes several minutes to tens of minutes. After waiting for a while and refreshing the browser screen, the Status column will change from CREATING to READY, and you will be able to use the Organization.

Being Invited to an Existing Organization

Please provide your email address to the owner of an existing Organization and request to be added to the Organization in the portal.

The user who receives the request should select the Organization they want to add users to, then click MANAGE USERS.

saas-manage-users

After navigating to the screen, clicking ADD USER in the upper right will display a form to register an email address.

saas-add-user

When adding a user, you can select a Permission. Higher permissions include all features of lower permissions.

  • Admin
    • Can check the procedure for installing Agent in the portal and manage users in the Organization.
  • Editor
    • Can edit Grafana dashboards.
  • Viewer
    • Can view Grafana dashboards.

After entering the requested email address, select the appropriate Permission and click ADD to add the user to the Organization.

Accessing the Organization's Server

In the portal, you can see a list of Organizations to which the user belongs. Clicking on the Dashboard URL of the target Organization will give you access to that Organization's Grafana dashboard.

saas-organizations

This URL will not change unless you recreate the Organization, so please bookmark it directly for your use.

Installing the Agent

The keys and access information for the Agent differ for each Organization to which the user belongs. Select an Organization in the portal and click the VIEW INSTALLATION button to display installation instructions with tokens containing this information.

saas-installation

Please copy the displayed instructions and execute them on the target compute node.

On-Premises Version

In the on-premises version, you can start using the product by installing AIBooster Server and Agent on your nodes.

Here, we introduce the procedure for installing both Server and Agent on a single node. For configuration methods when installing Server and Agent on separate nodes or installing multiple Agents, please refer to Advanced Setup.

Preparing the Node

Please confirm that the target installation node meets the following conditions in addition to the Supported Environment:

  • A user exists
  • SSH password login is possible
  • Administrator privileges (sudo) are available
  • Docker v28 or later is installed
tip

If Docker is not installed, it can be easily installed with the following command:

curl -fsSL https://get.docker.com | sh

Also, check the IP address of the target node.

Installing Server and Agent

Execute the following command on the target node or on a Linux machine that can SSH access the target node:

curl -LO assets.aibooster.fixstars.com/faibup.sh && sh faibup.sh

Setup will be completed by answering questions about installation such as the target node's IP address and password information.

faibup

Operation Verification

  1. Open http://localhost:3000 in a browser
  2. Log in with username: admin, password: admin
  3. When prompted to change password, set a new password
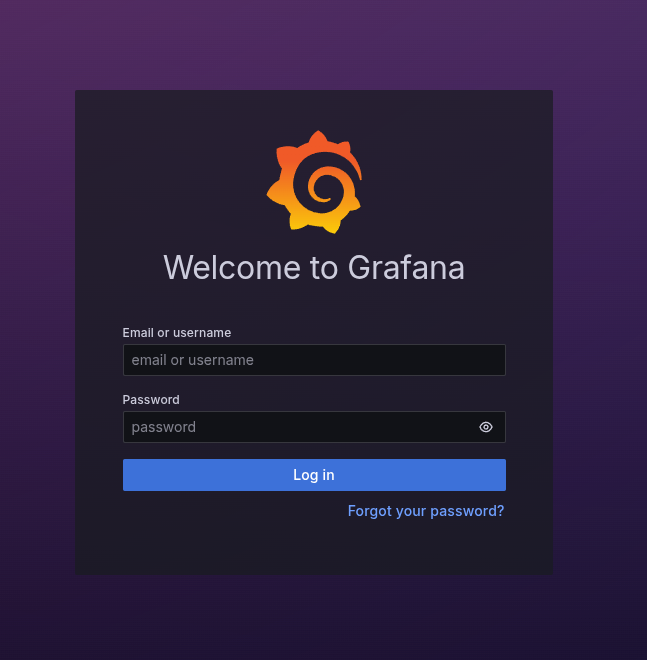
Grafana Login

info

This setup is a minimal configuration for evaluation and development environments. For production environments, please perform installation and security configuration according to Advanced Setup.